
Taranto!

Richard put on a terrific refight of the naval Battle of Taranto at the club on Friday 3 October, using a specially made mat from Tiny Wargames, his battle-specific 1:3000 Italian ships and aircraft, and General Quarters 3 rules.
Background
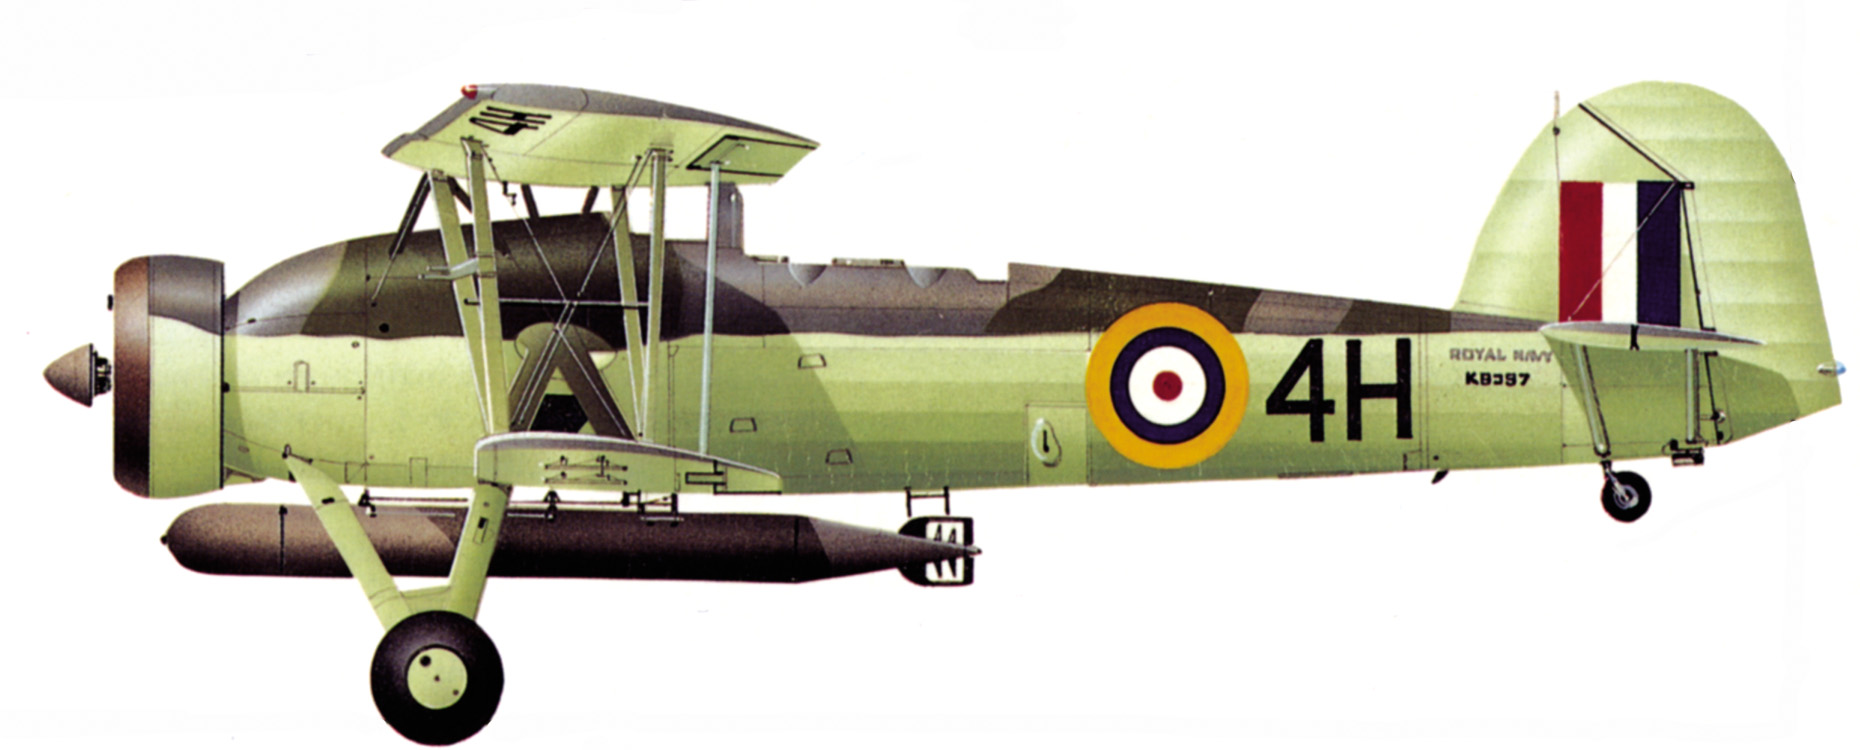
The historical battle took place on the night of 11/12 November 1940 during WWII between British naval forces (under Admiral Cunningham) and Italian naval forces (Admiral Campioni). The Royal Navy launched the first all-aircraft ship-to-ship naval attack in history, employing 21 Fairey Swordfish biplane torpedo bombers from the aircraft carrier HMS Illustrious in the Mediterranean Sea.

Taranto is a natural harbour improved through centuries of fortification. It has been a strategic naval base since the 5th century BC. Dominated by a large breakwater (the Diga di San Vito), Taranto was subdivided into inner (Mar Piccolo) and outer (Mar Grande) harbours. Being squarely in the middle of the Mediterranean Sea, warships based there could easily transit to Western or Eastern basins. Long before WWII, the British looked at ways to neutralize the Italian battle fleet through a surprise attack on Taranto. A draft plan was developed in 1935 in response to the Italian invasion of Abyssinia. This stayed in the files until the outbreak of war with Italy June 1940. Initially two carriers were to be involved, but ultimately only the HMS Illustrious with 21 Swordfish and escorts took part in the operation from the Ionian Sea where they arrived at 2000 hours on 11 November 1940.
Sitrep

We had a large turnout with eight players, each flying one or two Fairey Swordfish torpedo-bombers, a total force of 12 aircraft models across two missions, tasked with sinking all five (of six actual) battleships represented in the outer harbour of the Italian naval base of Taranto. While six aircraft had torpedoes only, a further six had either aerial bombs only, or bombs and flares. Numerous other targets, including cruisers, light cruisers and destroyers were also in the mix. Port facilities were to be destroyed too.

Richard posted AA guns, searchlights (white tiddlywinks), torpedo nets (depicted as string), and barrage balloons (orange tiddlywinks) around the harbour area ready to intercept. Historically, the base of Taranto was defended by 101 anti-aircraft guns and 193 machine guns and was usually protected against low-flying aircraft by barrage balloons, of which only 27 were up on 11 November, as strong winds on 6 November had blown away 60 balloons. What follows is a simplified cinematic account of the highlights…
First Run

Richard briefed the players, explaining rules, scenario parameters, and attack directions. I logged players’ names on a roster of pilots, armaments, and targets (besides frantically taking notes and photos for this here blog).

Turn one began with Rob, Joel and Patrick launching an auxiliary attack from the southeast, bombing seaplane hangars (causing minor damage), then dropping flares to illuminate the harbour.

The main attack, also launched from HMS Illustrious, was flown by Doug (two planes – one with bombs, one with torpedo), and three more with torpedoes (Alex, Paul, and Patrick), approaching the outer harbour from the southwest. It was soon spotted by a searchlight.

The second turn witnessed a third group of aircraft coming on from the northeast: Alex, Mark, Patrick and Rob encroached, aiming to bomb warehouses at the inner harbour. Rob soon struck a warehouse, gaining a victory point…

Meanwhile, Simon’s fourth group of two planes started a flight from the northwest.

Doug’s leading plane with the main group now opened proceedings and struck the light cruiser Duca d’Aosta with a bomb.

Alex however missed the cruiser Trento in the inner harbour.

By now, flares were illuminating the harbour. Another of Alex’s planes launched a torpedo against the battleship Vittorio Veneto, but missed.

Mark dropped a bomb on a warehouse at the inner harbour but missed.

At the inner harbour, the players were gearing up for a frenzy of bombing and torpedoing, but were not always accurate… Alex hit the cruiser Bolzano but it didn’t go off. Rob damaged the hull of the same ship. Mark bombed the cruiser Trieste but missed…

Meanwhile, Paul hit the battleship Littorio with a torpedo, causing hull and main armament damage…

Joel duly bombed a warehouse, whereas Doug struck the light cruiser Bande Nere with a bomb.

In the second phase of turn two, Simon edged closer to the harbour. Joel bombed the cruiser Trieste, causing major damage to hull and other areas, but missed against the Bolzano…

Doug now hit the light cruiser Giussano

Meanwhile, Alex struck the Trento, causing hull and rudder damage, and Mark also struck the adjacent ship Bolzano…

On turn three, Rob and Joel, empty of armaments, turned for home. Patrick now arrived, however, and damaged the hull of the cruiser Fiume with a bomb, before missing the cruiser Zara. He then also flew home…

Mark also left the scene, having hit the hull and secondary armament of the Trento in the inner harbour. Alex’s two aircraft departed, after one bombed and hit the hull of the Zara..

Contrary to scenario orders, or just possibility, most players were hitting the cruisers rather than the battleships. For all that, AA fire was largely ineffective and the vulnerable ships were sitting ducks

Now Simon’s flight arrived, and failed to hit the battleship Littorio, but his torpedo struck the battleship Vittorio Veneto – causing hull damage and a fire…
Second Run

The second mission began with all participating players concentrated by the eastern approaches to the harbour. Alex, Patrick, Rob and Joel began from the southeast, near the outer harbour. Patrick, Mark, Alex and Paul began from the northeast, closer to the inner harbour.

Joel scored a hit on the seaplane hangar and a victory point, but was soon downed by AA fire!

Alex attacked the Trieste in the inner harbour… and soon battered the Bolzano with two hull damage points, before damaging the hull of the Vittorio Veneto.

Paul’s torpedo-armed Swordfish hit the battleship Giulio Cesare, while Patrick hit the battleship Andrea Doria – damaging hull and forward areas

Flares had by now been laid by Rob’s aircraft, marked as yellow tiddlywinks… though the blaze of steel, wood and ammunition blasts already provided adequate light and spectacle

Still, Alex pressed on against the Trento, which sank!

While Mark battered the ailing Bolzano with two hits…

And Patrick dealt hull damage, a fire and aft damage to the Duca D’Aosta. Done with flares, Rob bombed the cruiser Gorizia, striking its hull and engineering. Alex now bombed the Zara and hit the hull, while Doug was shot down by AA fire!

Rob hit the Zara’s hull and started a fire. As the players flew home, Simon arrived and aimed at the Vittorio Veneto but only hit the broken Andrea Doria (damaging hull and guns). The ship now had 8 hull damage points.
Conclusion
All players survived both runs, except Joel and Doug in run 2, victims of AA fire. Paul claimed two sunk battleships after two torpedo attacks, Alex sank the Trento, while Rob struck 6 on target out of 8 bombs. Nothing short of a frenzied evening of fun all round, with players doing better than the original operation. The models and mat looked absolutely spectacular. Thanks to Richard for hosting a classic club game!
In the real battle, 21 Royal Navy torpedo bombers managed to disable three Italian battleships, 1 heavy cruiser and 2 destroyers, for the loss of two Fairey Swordfish. The torpedo nets were not set deeply enough, and the base was taken by surprise. The attack proved to be seminal for the course of naval aviation, and was studied by the Japanese, preparing for Pearl Harbour.
Historical Battle – Direction of Waves


